

Flutter02-核心基础-状态管理
Flutter02-核心基础-状态管理
状态管理
管理状态的最常见的方法:
- Widget 管理自己的状态。
- Widget 管理子 Widget 状态。
- 混合管理(父 Widget 和子 Widget 都管理状态)。
如何决定使用哪种管理方法?下面是官方给出的一些原则可以帮助你做决定:
- 如果状态是用户数据,如复选框的选中状态、滑块的位置,则该状态最好由父 Widget 管理。
- 如果状态是有关界面外观效果的,例如颜色、动画,那么状态最好由 Widget 本身来管理。
- 如果某一个状态是不同 Widget 共享的则最好由它们共同的父 Widget 管理。
在 Widget 内部管理状态封装性会好一些,而在父 Widget 中管理会比较灵活。有些时候,如果不确定到底该怎么管理状态,那么推荐的首选是在父 Widget 中管理(灵活会显得更重要一些)。
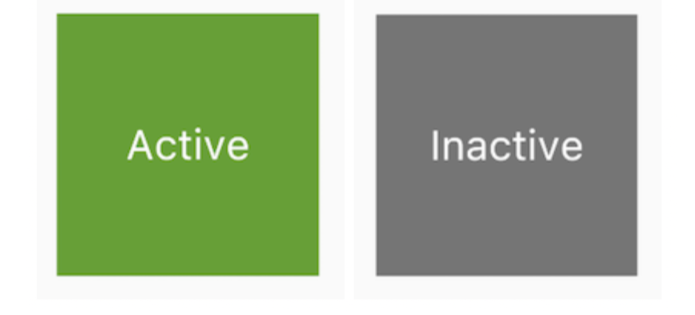
接下来,我们将通过创建三个简单示例TapboxA、TapboxB和TapboxC来说明管理状态的不同方式。 这些例子功能是相似的 ——创建一个盒子,当点击它时,盒子背景会在绿色与灰色之间切换。状态 _active确定颜色:绿色为true ,灰色为false,如图所示:
Widget管理自身状态
管理TapboxA的状态。
class TapboxA extends StatefulWidget {
  const TapboxA({Key? key}) : super(key: key);

  @override
  State<TapboxA> createState() => _TapboxAState();
}

class _TapboxAState extends State<TapboxA> {
  bool _active = false; // 确定盒子的当前颜色的布尔值。

  void _handleTap(){
    setState(() {
      _active = !_active; // 点击该盒子时更新_active,并调用setState()更新UI。
    });
  }

  @override
  Widget build(BuildContext context) {
    return GestureDetector(
      onTap: _handleTap,
      child: Container(
        child: Center(
          child: Text(
            _active ? 'Active' : 'Inactive',
            style: const TextStyle(fontSize: 32.0, color: Colors.white),
          ),
        ),
        width: 200.0,
        height: 200.0,
        decoration: BoxDecoration(
          color: _active ? Colors.lightGreen[700] : Colors.grey[600]
        ),
      ),
    );
  }
}

void main(List<String> args) {
  runApp(const MaterialApp(
    title: 'My app',
    home: TapboxA(),
  ));
}
父Widget管理子Widget的状态
在以下示例中,TapboxB通过回调将其状态导出到其父组件,状态由父组件管理,因此它的父组件为StatefulWidget。但是由于TapboxB不管理任何状态,所以TapboxB为StatelessWidget。
ParentWidgetState 类:
- 为TapboxB 管理_active状态。
- 实现_handleTapboxChanged(),当盒子被点击时调用的方法。
- 当状态改变时,调用setState()更新UI。
TapboxB 类:
- 继承StatelessWidget类,因为所有状态都由其父组件处理。
- 当检测到点击时,它会通知父组件。
// ParentWidget 为 TapboxB 管理状态.
//------------------------ ParentWidget --------------------------------
class ParentWidget extends StatefulWidget {
  const ParentWidget({Key? key}) : super(key: key);

  @override
  State<ParentWidget> createState() => _ParentWidgetState();
}

class _ParentWidgetState extends State<ParentWidget> {
  bool _active = false;

  void _handleTapboxChanged(bool newValue) {
    setState(() {
      _active = newValue;
    });
  }

  @override
  Widget build(BuildContext context) {
    return TapboxB(
      active: _active,
      // 在父容器_handleTapboxChanged函数中,更新状态,然后把_handleTapboxChanged函数传入子组件中
      onChanged: _handleTapboxChanged,
    );
  }
}

//------------------------- TapboxB ----------------------------------
class TapboxB extends StatelessWidget {
  const TapboxB({
    Key? key,
    this.active: false,
    required this.onChanged,
  }) : super(key: key);

  final bool active;
  final ValueChanged<bool> onChanged;

  void _handleTap() {
    onChanged(!active);
  }

  @override
  Widget build(BuildContext context) {
    return GestureDetector(
      onTap: _handleTap,
      child: Container(
        child: Center(
          child: Text(
            active ? 'Active' : 'Inactive',
            style: const TextStyle(fontSize: 32.0, color: Colors.white),
          ),
        ),
        width: 200.0,
        height: 200.0,
        decoration: BoxDecoration(
          color: active ? Colors.lightGreen[700] : Colors.grey[600],
        ),
      ),
    );
  }
}

void main(List<String> args) {
  runApp(const MaterialApp(
    title: 'My app',
    home: ParentWidget(),
  ));
}
混合状态管理
对于一些组件来说,混合管理的方式会非常有用。在这种情况下,组件自身管理一些内部状态,而父组件管理一些其他外部状态。
在下面 TapboxC 示例中,手指按下时,盒子的周围会出现一个深绿色的边框,抬起时,边框消失。点击完成后,盒子的颜色改变。 TapboxC 将其_active状态导出到其父组件中,但在内部管理其_highlight状态。这个例子有两个状态对象_ParentWidgetState和_TapboxCState。
_ParentWidgetStateC类:
- 管理_active 状态。
- 实现 _handleTapboxChanged() ,当盒子被点击时调用。
- 当点击盒子并且_active状态改变时调用setState()更新UI。
_TapboxCState 对象:
- 管理_highlight 状态。
- GestureDetector监听所有tap事件。当用户点下时,它添加高亮(深绿色边框);当用户释放时,会移除高亮。
- 当按下、抬起、或者取消点击时更新_highlight状态,调用setState()更新UI。
- 当点击时,将状态的改变传递给父组件。
//---------------------------- ParentWidget ----------------------------

class ParentWidgetC extends StatefulWidget {
  const ParentWidgetC({Key? key}) : super(key: key);

  @override
  State<ParentWidgetC> createState() => _ParentWidgetCState();
}

class _ParentWidgetCState extends State<ParentWidgetC> {
  bool _active = false; // 控制TapboxC的颜色

  void _handleTapboxChanged(bool newValue) {
    setState(() {
      _active = newValue;
    });
  }

  @override
  Widget build(BuildContext context) {
    return Container(
      child: TapboxC(
        active: _active,
        onChanged: _handleTapboxChanged,
      ),
    );
  }
}

//----------------------------- TapboxC ------------------------------
class TapboxC extends StatefulWidget {
  const TapboxC({
    Key? key,
    this.active: false,
    required this.onChanged,
  }) : super(key: key);

  final bool active; // 控制TapboxC的颜色
  final ValueChanged<bool> onChanged; // 点击时回调此函数

  @override
  State<TapboxC> createState() => _TapboxCState();
}

class _TapboxCState extends State<TapboxC> {
  bool _highlight = false; // 控制边框颜色,按下和松开时,颜色不一样

  void _handleTapDown(TapDownDetails details) {
    setState(() {
      _highlight = true;
    });
  }

  void _handleTapUp(TapUpDetails details) {
    setState(() {
      _highlight = false;
    });
  }

  void _handleTapCancel() {
    setState(() {
      _highlight = false;
    });
  }

  void _handleTap() {
    widget.onChanged(!widget.active); // 回调,改变状态
  }

  @override
  Widget build(BuildContext context) {
    // 在按下时添加绿色边框,当抬起时,取消高亮
    return GestureDetector(
      onTapDown: _handleTapDown, // 处理按下事件
      onTapUp: _handleTapUp, // 处理抬起事件
      onTap: _handleTap,
      onTapCancel: _handleTapCancel,
      child: Container(
        child: Center(
          child: Text(
            widget.active ? 'Active' : 'Inactive',
            style: const TextStyle(fontSize: 32.0, color: Colors.white),
          ),
        ),
        width: 200.0,
        height: 200.0,
        decoration: BoxDecoration(
          color: widget.active ? Colors.lightGreen[700] : Colors.grey[600],
          border: _highlight
              ? Border.all(
                  color: Colors.teal[700]!,
                  width: 10.0,
                )
              : null,
        ),
      ),
    );
  }
}

void main(List<String> args) {
  runApp(const MaterialApp(
    title: 'My app',
    home: ParentWidgetC(),
  ));
}
评论
匿名评论
隐私政策
你无需删除空行,直接评论以获取最佳展示效果